AT-AT
The AT-AT is an interesting model in the sense that it has both a relatively simple base shape but also much detail. Using reference images helped with positioning but more often than not understanding the detail of the shape was useful from online research of different perspectives.
The head featured some complex extrusions which required more than the connection tool could offer. In some cases it was necessary to manually align to moved vertices to achieve the desired shape or simply line them up. The tool is however a quick method of creating extra surface geometry when combined with the 'insert vertex' tool.

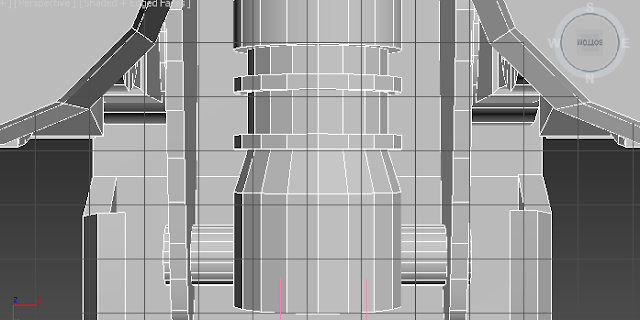
As proved by both the previous methods, creating surface detail and unique shapes is most effectively achieved through the connect and boolean subtraction tool. These have have worked well time and time again because they allow unique shapes to be cut out such as the tube shown connecting the foot and the 'ankle'. Removing any intersecting geometry is good practice and avoids issues of clipping or wasted contribution towards the poly count.
The details on the side caused an issue in debating the best method for adding these shapes. While using autrogrid on the boxes on the top was ideal, the panels shown in the middle had to be cut into the shape. While fairly quick and easy to do using boolean subtraction, adding a lone box with no connections to the face it is in can cause issues with the shading and rendering by adding extra necessary edges. This is not always an issue, but as in this example it appears to occur more frequently on more complex and uneven surfaces such as this.
While the reference images offer many benefits in terms of accuracy of details and keeping proportion, they are limited in what they can show. Researching different views online revealed how the legs were connected under the main body. Using 'inset' and extrude on a cylinder created a unique shape with much detail and only edges where they were needed. I chose to keep the default 18 edges of the cylinder as this is a large shape and a more low poly appearance would stand out more. Smaller detail such as small guns have less segments.
The model with all it's details is shown below in all viewports and perspective view. I have enabled edged faces to help the detail stand out better, however texturing and ambient occlusion will achieve this for the second assignment.
Good parts:
- High level of detail in important areas that will be focused on in the animation sequence
- Unique shapes made possible through effective use of boolean subtraction
- Attention to detail in areas such as the foot connection having a cylinder go through the foot to link them
- Good practice including using boolean subtraction to remove intersecting geometry
- Detail included in modeling and not texturing gives it depth such as using inset for panels and windows for the slight surrounding gap
- Better solution for cutting out panels to avoid adding extra edges in undesirable places
- Areas such as the neck are polygon intensive to created bumps in the cylinder. An extended primitive may prove a better a solution
- High level of detail has resulted in a high poly count. While this isn't too intensive for rendering the animation, exporting the model to a game engine would likely require some simplifying


No comments:
Post a Comment